With Introduction of more & more gadgets ,HTML5, Flash objects and many more technologies to come in near future
It often becomes annoying when you can't incorporate those in your test suite for some weird reason
I was assigned a Microsoft DX Project as most of you are aware those annoying Lookup's which you can't even know what objects you are going to work with.
In traversing through the DOM.Which is crucial for WebDriver/Selenium RC
Here's how i dealt with it by implementing sikuli within my webDriver scripts
What/Why is Sikuli now ?
Sikuli Script automates anything you see on the screen. It uses image recognition to identify and control GUI components.
It is useful when there is no easy access to a GUI's internal or source code so that you interact with it or complex flash objects list the is not limited to only these many more cross browser,operating system compatible
Download the latest version based on your Operating System from http://www.sikuli.org/download.html
For windows here are steps with Pre-requisites & installation :
Only 32-bit version is provided. But this version should run on both 32-bit and 64-bit Windows systems.
Prerequisites:
1. Make sure you have installed the official Sun Java 6 JRE 32-bit version (Java 7 or 64-bit are not supported).
2. Make sure you have uninstalled all previous versions of Sikuli (especially 0.10.x versions).
3. Make sure you have restarted your system after you installed JRE and uninstalled old Sikuli installations.
Installation Steps:
1. Download and install Sikuli using the self-extracting installer: Sikuli-X-1.0rc3 (r905)-win32.exe.
After installation is completed, a folder named Sikuli X should be created on your system.
2. Do not start using Sikuli X now because it has some bugs.
3. Download the following zip file: Sikuli X r930. This contains important bug fixes
4. Open the downloaded zip file and locate the folder called SIKULI-IDE.
5. Copy the content in SIKULI-IDE to Sikuli X. The purpose of this step is to replace the files associated with r905 (the buggy version)
by the files associated with r930 that has the most recent bug fixes.
After all the above steps you should be able to see sikuli installed in your All programs or whereever you have installed
Now,Let's get started launching Sikuli if you've installed in your All Programs > Sikuli X > Sikuli IDE
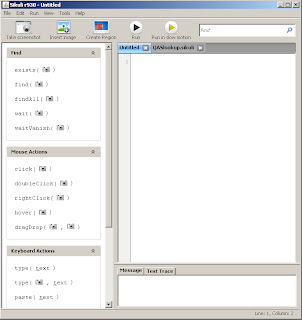
Sikuli IDE Editor will be launched - Just, like the one shown in below screen shot

On the left hand side of the IDE you see different commands available on the right side is where you would see commands copied
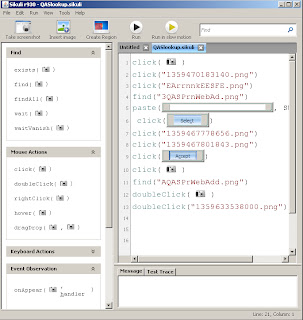
Below is an example with some random click an object on the web page,find a object on the web page ,doubleClick an object on the webpage

You can build as complex a script as you want.
An amazing feature Sikuli has to offer other than being open source and matching images is that one can use Sikuli features in your Java program through the Sikuli Script Java API
Here's are steps how you add Sikuli API to your existing library
I am using Eclipse IDE so steps mentioned will be what needs to be done with Eclipse
How do i add the jar to eclipse ?
Right click on your project > Build Path > Configure Build Path
Now that you see a popup with Properties to Java Build
Click on the Libraries tab then click on Add External Jars
Add sikuli-api-1.0.2-standalone.jar that you have downloaded earlier
import org.sikuli.script.FindFailed;
import org.sikuli.script.Screen;

public class SomeTest
{
public static Screen screen;

        @BeforeClass
	public static void setUp()
	{

			System.setProperty("webdriver.ie.driver", "C:\\Eclipse\\Selenium\\IEDriverServer.exe");
			screen = new Screen();

	}

        public void popUp() throws FindFailed, InterruptedException
	{
		   screen.exists("C:\LookupRecords.png", 10); //here you will specify the location of your image file
		   Thread.sleep(10);
		   screen.click("C:\\OK.png",0);  //here you will specify the location of your image file
	}

        @Test
        public void someSikulitest()
        {
          // do something ...
          // call the above method
             popUp();
         }

        @AfterClass
	public static void tearDown()
	{
			driver.close();
         		driver.quit();
	}


}
feel free to let me know how it goes , your comments are valuable